
PC Building Tips: Master your first custom build with these 10 essential tips. Learn compatibility, tools, assembly steps, and avoid costly mistakes as a beginner.
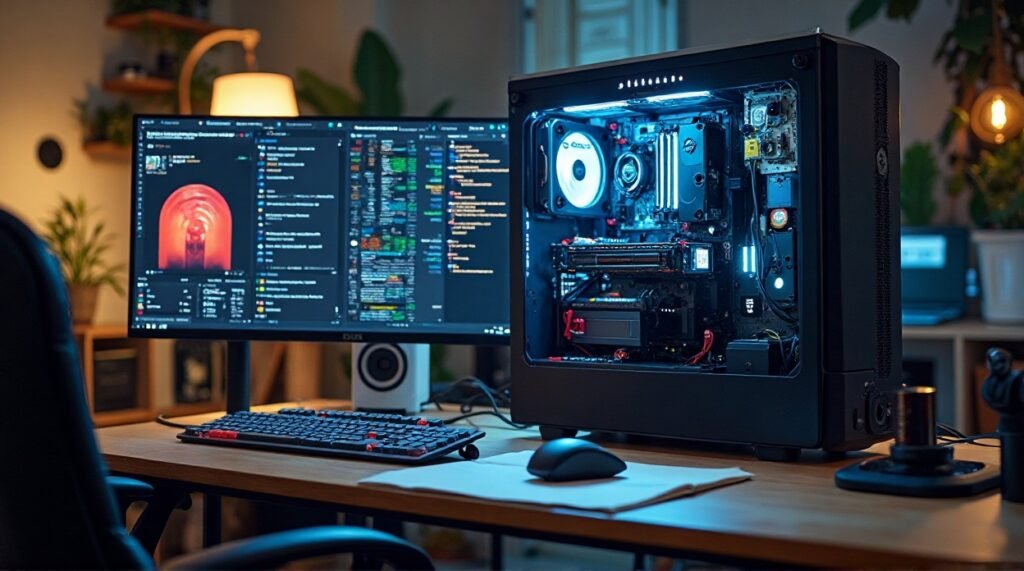
Building your first PC feels like assembling a spaceship, doesn’t it? I remember staring at my box of components three years ago, wondering if I’d accidentally ordered a puzzle designed by rocket scientists. The truth? Building a PC is actually more like adult LEGO – intimidating at first glance, but surprisingly straightforward once you know the essential PC building tips.
Here’s the thing: every tech enthusiast started exactly where you are right now. That nervous excitement mixed with “what if I break something expensive?” is totally normal. But here’s what separates successful first-time builders from those who end up with expensive paperweights: knowing the right PC building guide before you start.
Whether you’re a student trying to build a budget gaming rig or someone who’s finally ready to ditch that ancient laptop, these 10 essential tips will transform you from a nervous beginner into a confident PC builder. No tech jargon, no confusing shortcuts – just straightforward, tested advice that actually works.
Why These PC Building Tips Matter More Than You Think
Before we dive into the nitty-gritty, let’s address the elephant in the room: why build a PC instead of buying one? Simple. You get exactly what you want, save money, and gain skills that’ll serve you for years. Plus, there’s something deeply satisfying about pressing that power button on a machine you built with your own hands.
The average pre-built gaming PC markup is around 20-30%. That means a $1,500 custom build might cost you $2,000 from a manufacturer. Those savings? They add up fast, especially when you’re starting college or entering the job market.
Tip #1: Master the Essential Tools for Building a PC at Home
What are the essential tools needed for building a PC? This is hands-down the most common question I get from first-timers, and here’s the refreshing truth: you need fewer tools than you think.
Your PC Building Toolkit
| Essential Tools | Optional but Helpful |
|---|---|
| Phillips head screwdriver | Magnetic screwdriver |
| Anti-static wrist strap | Cable ties |
| Thermal paste | Compressed air |
| Good lighting | Parts organizer |
The Phillips head screwdriver is your best friend – get a good one with a comfortable grip because you’ll be using it a lot. An anti-static wrist strap isn’t just paranoia; it’s insurance against frying your expensive components with static electricity.
Here’s a pro tip I learned the hard way: work on a hard, non-carpeted surface. My first build almost became a disaster when I assembled everything on my bedroom carpet. Static electricity is the silent killer of PC components.
Tip #2: Choose Compatible Parts Like a Pro
How do I choose compatible parts for my PC build? This question keeps beginners awake at night, but compatibility checking is actually pretty straightforward when you know what to look for.
The Compatibility Checklist
CPU and Motherboard Socket Match: This is non-negotiable. Intel CPUs use different sockets than AMD, and even within brands, different generations need different sockets. Your Intel Core i5-13600K needs an LGA1700 socket motherboard – period.
RAM Compatibility: Not all RAM works with all motherboards. Check your motherboard’s Qualified Vendor List (QVL) – it’s like a compatibility guarantee from the manufacturer.
PSU Wattage Calculation: Here’s a simple formula that works:
- Add up your CPU and GPU power consumption
- Multiply by 1.2 for headroom
- That’s your minimum PSU wattage
For example: RTX 4070 Ti (285W) + Intel i5-13600K (125W) = 410W × 1.2 = 492W minimum PSU.
Recommended Compatible Component Combinations
| Budget Tier | Mid-Range | High-End |
|---|---|---|
| AMD Ryzen 5 5600 | Intel i5-13600K | Intel i7-13700K |
| GTX 4060 | RTX 4070 Ti | RTX 4080 |
| 16GB DDR4-3200 | 32GB DDR4-3600 | 32GB DDR5-5600 |
| 650W PSU | 750W PSU | 850W PSU |

Tip #3: Follow the Step-by-Step PC Build Process
What is the step-by-step process to build a PC? Think of this as your assembly roadmap – follow it exactly, and you’ll avoid 90% of first-timer mistakes.
The Foolproof Build Order
- Prepare Your Workspace
- Clear, static-free surface
- Good lighting
- All tools within reach
- Install CPU and RAM on Motherboard (Outside the Case)
- This is so much easier when the motherboard is flat on your desk
- Install CPU cooler now if it’s a tower cooler
- Mount PSU in Case
- Fan facing down if your case has bottom ventilation
- Fan facing up if your case sits on carpet
- Install Motherboard Standoffs
- These prevent your motherboard from shorting against the case
- Don’t skip this step – I’ve seen expensive boards fried this way
- Mount Storage Drives
- SSDs go in designated bays
- Plan your cable routing now
- Connect All Cables Before Final Assembly
- Power cables to motherboard and components
- Data cables to storage drives
- Front panel connectors (this part tests everyone’s patience)
The “First Boot” Moment
When everything’s connected, double-check every connection before hitting that power button. The most nerve-wracking moment? That first boot attempt. If it doesn’t work immediately, don’t panic – troubleshooting is part of the learning process.
Tip #4: Avoid These Common PC Building Mistakes
How can I avoid common mistakes when building a PC? Learn from others’ expensive mistakes instead of making your own.
The Big Four Mistakes (and How to Avoid Them)
Mistake #1: Forgetting the I/O Shield This little metal plate that comes with your motherboard? Install it before you mount the motherboard. Forgetting means dismantling everything later.
Mistake #2: Using Too Much Thermal Paste A rice-grain-sized drop is enough. More doesn’t mean better – it means potential short circuits.
Mistake #3: Not Checking PSU Orientation Your power supply fan should intake cool air and exhaust warm air. Most cases want the fan facing downward, but check your specific case manual.
Mistake #4: Forcing Components If something doesn’t fit easily, stop and check why. PC components are designed to fit smoothly – forcing usually means you’re doing something wrong.
Quick Pre-Build Checklist
- [ ] All components compatibility verified
- [ ] Workspace prepared and static-free
- [ ] All necessary tools gathered
- [ ] Motherboard manual downloaded and nearby
- [ ] Cable management plan sketched out
Tip #5: Smart Budgeting for Your PC Build
How much does it typically cost to build a PC? The answer depends entirely on your needs, but here’s how to budget smartly without overspending.
Budget Breakdown by Use Case
| Build Type | Total Cost | Key Components |
|---|---|---|
| Basic Office Work | $400-600 | Integrated graphics, basic CPU |
| 1080p Gaming | $800-1200 | Mid-range GPU, 16GB RAM |
| 1440p Gaming | $1200-1800 | High-end GPU, fast CPU |
| 4K Gaming/Content Creation | $2000+ | Top-tier everything |
The Smart Spending Strategy
Spend Most On: GPU (for gaming), CPU (for productivity), PSU (for reliability) Save Money On: Case, optical drives, fancy RGB lighting Never Skimp On: Power supply quality, motherboard features you actually need
Here’s a budget reality check: your first build doesn’t need to be perfect. Start with solid basics and upgrade later. That’s the beauty of PC building – it’s modular.
Cheap PC Build Ideas with Great Performance
- Use last-gen components: A Ryzen 5 5600 still crushes modern games
- Buy quality used GPUs: Check reputable sellers for 30-40% savings
- Skip the RGB initially: Focus performance over aesthetics
- Choose micro-ATX: Smaller motherboards and cases cost less
Tip #6: Choose the Right CPU and GPU Combo
What is the best CPU and GPU for a gaming PC build? This pairing makes or breaks your gaming experience, so let’s get it right.
The Perfect CPU-GPU Balance
For 1080p Gaming:
- CPU: AMD Ryzen 5 5600 or Intel i5-12400F
- GPU: RTX 4060 Ti or RX 7600 XT
- Why: These CPUs won’t bottleneck mid-range GPUs
For 1440p Gaming:
- CPU: Intel i5-13600K or AMD Ryzen 7 5800X3D
- GPU: RTX 4070 Ti or RX 7800 XT
- Why: Higher resolution needs more GPU power, still reasonable CPU demands
For 4K Gaming:
- CPU: Intel i7-13700K or AMD Ryzen 9 5900X
- GPU: RTX 4080 or RX 7900 XTX
- Why: 4K gaming demands the best of both worlds
Building a Gaming PC on a Budget
The secret sauce? Prioritize GPU over CPU for gaming builds. A $200 CPU with a $400 GPU will outgame a $400 CPU with a $200 GPU every single time.
Budget Gaming Goldmine: Last-generation high-end beats current-generation mid-range. An RTX 3080 (if you find it at the right price) can outperform an RTX 4060 Ti while costing similar money.
Tip #7: Master CPU and Cooling Installation
How do I properly install the CPU and cooling system? This step makes beginners sweat, but it’s actually one of the most straightforward parts when done methodically.
CPU Installation: The Gentle Touch
For Intel CPUs:
- Open the CPU socket (lift the retention arm)
- Remove the plastic socket cover
- Align CPU with socket (look for the alignment markers)
- Gently place CPU in socket – it should drop in with zero force
- Lower the retention arm (this requires some pressure – that’s normal)
For AMD CPUs:
- Lift the retention arm
- Align CPU triangle with socket triangle
- Place CPU gently – again, zero force needed
- Lower retention arm
How to Install CPU Cooler Properly
Air Cooler Installation:
- Apply thermal paste (rice grain size) to CPU center
- Mount cooler according to your CPU socket type
- Tighten screws in X-pattern, gradually and evenly
- Connect cooler fan cable to CPU_FAN header
AIO Cooler Setup:
- Install radiator fans to case first
- Apply thermal paste to CPU
- Mount pump/block to CPU
- Connect pump power and radiator fans
- Fill and test system before final assembly
Pro Installation Tips
Thermal Paste Application: Less is more. The pressure from mounting spreads it perfectly – you don’t need to manually spread it.
Cable Management: Route CPU cooler cables before final tightening. You’ll thank yourself later.
Testing: Always test CPU temps under load after installation. Idle temps around 30-40°C and load temps under 80°C are perfect.
Tip #8: Cable Management That Actually Works
What are some good cable management tips for PC builders? Clean cable management isn’t just about looks – it improves airflow and makes future upgrades easier.
Simple Cable Management for PC Builds
The “Hide and Route” Method:
- Route cables behind the motherboard tray first
- Use built-in case routing holes – they’re there for a reason
- Bundle cables by destination – all motherboard power cables together
- Leave service loops for future component changes
Cable Management Priority List
Must-Do:
- Keep cables away from fans
- Route 24-pin motherboard power cleanly
- Organize front panel connectors
- Secure loose cables with zip ties
Nice-to-Have:
- Sleeve cables for uniform look
- Use custom cable extensions
- Hide all cables completely
- RGB cable coordination
The 80/20 Rule: Spend 80% of your cable management effort on the visible side panel. The back panel can be messy as long as it closes properly.
Quick Cable Routing Guide
| Cable Type | Best Route | Pro Tip |
|---|---|---|
| 24-pin ATX | Behind mobo, top routing | Pre-bend before installation |
| CPU 8-pin | Behind mobo, top-left | Route first, tighten last |
| GPU Power | Direct or behind mobo | Leave slack for GPU removal |
| SATA Data | Behind mobo tray | Use right-angle connectors |
Tip #9: BIOS Setup and First Boot Success
Do I need to update BIOS after building a new PC? Not always, but knowing how to handle BIOS setup separates successful builders from frustrated ones.
Setting Up BIOS on a New PC Build
First Boot Checklist:
- Connect monitor to GPU, not motherboard
- Plug in keyboard and mouse
- Ensure RAM is properly seated (this causes 50% of first-boot failures)
- Check all power connections one more time
Essential BIOS Settings:
- Enable XMP/DOCP for RAM speed
- Set boot priority to your installation media
- Check CPU and system temperatures
- Verify all components are detected
When to Update BIOS
Update BIOS if:
- Your CPU isn’t recognized
- RAM won’t run at rated speeds
- You’re experiencing stability issues
- You want new CPU support
Don’t update BIOS if:
- Everything works perfectly
- You’re not comfortable with the process
- Your system is mission-critical
BIOS Update Safety: Always use a UPS during BIOS updates. Power loss during update = expensive paperweight.
Tip #10: Troubleshooting When Things Go Wrong
How do I troubleshoot a PC build that won’t start or POST? Don’t panic – most “dead” builds have simple fixes.
Troubleshooting PC That Won’t Boot After Build
The “No Power” Troubleshoot:
- Check PSU power switch (it happens to everyone)
- Verify PSU is plugged into wall
- Test PSU paperclip method (Google this – it’s safe)
- Check 24-pin and CPU power connections
The “Powers On But No Display” Fix:
- Reseat RAM sticks (remove and reinstall)
- Try one RAM stick at a time
- Check monitor cable connection (GPU, not motherboard)
- Verify GPU power cables are connected
What to Do If PC Build Fails to Power On
The Systematic Approach:
- Strip build to bare minimum (CPU, one RAM stick, GPU)
- Test each component individually
- Add components back one at a time
- Document what works and what doesn’t
Common “Dead Build” Culprits:
- Loose RAM (60% of cases)
- Motherboard power not fully connected (25% of cases)
- DOA components (10% of cases)
- User error in connections (5% of cases)
How to Test PC Build Stability After Assembly
Stress Testing Schedule:
- Day 1: Basic functionality and BIOS
- Day 2: Operating system installation and drivers
- Day 3: Gaming/workload stress testing
- Week 1: Monitor temperatures and stability
Recommended Testing Tools:
- Prime95 for CPU stress
- MemTest86 for RAM testing
- FurMark for GPU stress
- CrystalDiskInfo for storage health

Essential Component Recommendations for Your First Build
Based on thousands of successful builds, here are the components that consistently deliver great results for beginners:
Best Budget Foundations
- Motherboard: MSI B450 Tomahawk or ASUS Prime B550M-A
- PSU: Seasonic Focus GX-650 – reliability you can trust
- Case: Phanteks Eclipse P400A – airflow and ease of building
Performance Sweet Spots
- CPU Cooler: Noctua NH-D15 – whisper quiet and incredibly effective
- Storage: Samsung 970 EVO Plus SSD – speed that makes everything snappy
- RAM: Corsair Vengeance LPX 16GB DDR4 – proven compatibility
High-End Reliability
- GPU: NVIDIA GeForce RTX 4080 for 4K gaming mastery
- PSU: Corsair RM850x – modular cables and dead-silent operation
- Motherboard: ASUS ROG Strix Z790-E Gaming – future-proof with every feature you need
Your PC Building Journey Starts Now
Building your first PC isn’t just about assembling components – it’s about joining a community of creators, problem-solvers, and tech enthusiasts who believe in making things with their own hands. Every expert was once a beginner who decided to take that first step.
The most important PC building tip? Start building. All the research in the world can’t replace the confidence that comes from successfully completing your first build. Yes, you might make small mistakes. Yes, you might need to troubleshoot issues. That’s not failure – that’s learning.
Remember: every component you install, every cable you route, every successful boot makes you more capable and confident. The PC you build today becomes the foundation for years of upgrades, modifications, and improvements.
Ready to Begin Your Build?
- Choose your components using the compatibility guidelines above
- Gather your tools and prepare your workspace
- Follow the step-by-step process methodically
- Join PC building communities for support and advice
- Document your build – you’ll want to remember this moment
Whether you’re building a budget gaming rig for college or a powerhouse workstation for content creation, these 10 essential PC building tips will guide you from nervous beginner to confident builder.
The best time to build your first PC was yesterday. The second-best time? Right now.
For more blog posts visit ugaskeyblog